

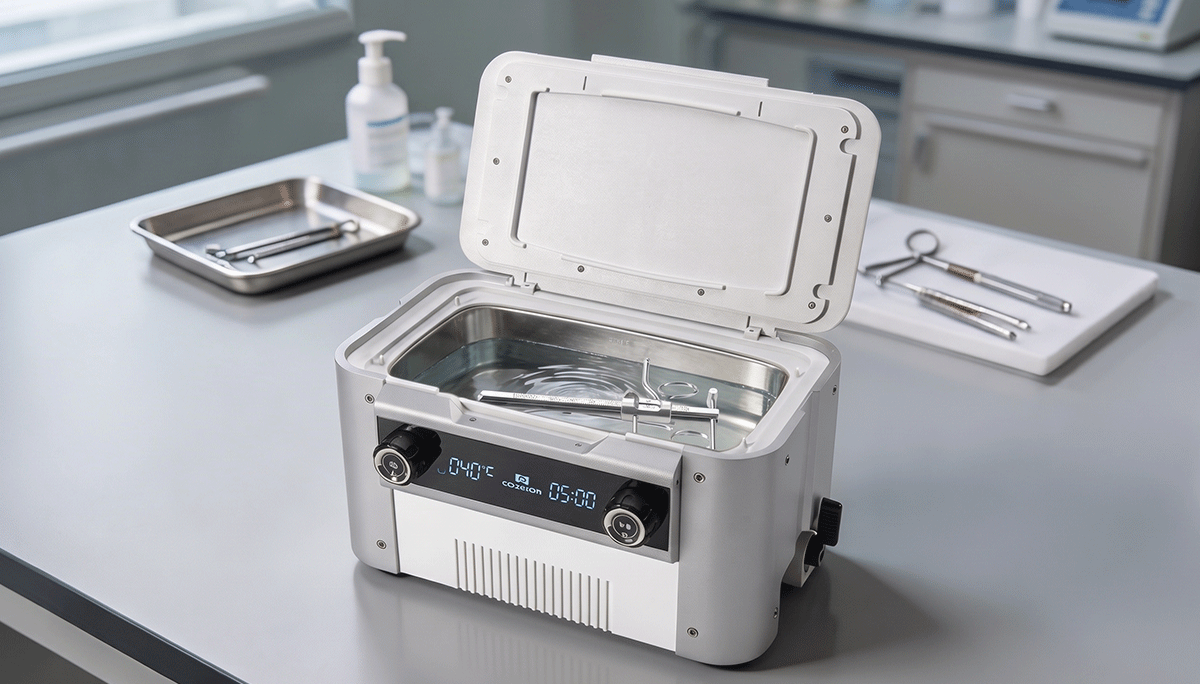
Ultrasonic energy creates billions of minute vacuum bubbles in an ultrasonic cleaning bath that implode with tremendous force when they contact dental instruments.
The process, called cavitation, reaches into tiny cracks and crevices, quickly and safely blasting loose and carrying away contaminants on dental instrument surfaces. Dental instrument ultrasonic cleaners are faster, safer and more efficient than mechanical washers or manually scrubbing sharp and pointed instruments.
Only after a thorough ultrasonic cleaning should dental instruments move to the second and third stage: disinfecting or sterilization then packaging.
Why Cleaning Must Precede Sterilization
Proper instrument reprocessing follows a critical sequence where cleaning must occur before sterilization. This sequence isn't merely procedural—it's scientifically necessary:
- Bioburden (blood, tissue, saliva) creates protective barriers that prevent sterilizing agents from reaching microorganisms
- Organic materials can bake onto instruments during heat sterilization, creating permanent residue that compromises function
- Sterilization indicators may provide false results when obscured by debris, undermining verification protocols
The CDC, FDA, and instrument manufacturers all emphasize this sequence because sterilization simply cannot succeed without thorough cleaning first.
Manual vs. Ultrasonic
Ultrasonic baths have several advantages over manual methods when cleaning dental items.
-
Deep Cleaning: Ultrasonic cleaners can reach and clean hard-to-reach areas, removing microscopic particles that manual cleaning methods can't.
-
Time-Efficiency: Ultrasonic cleaning is significantly faster than manual cleaning. The entire cleaning action can be completed within minutes, while manual cleaning can take much longer, especially when dealing with intricate or complex items.
-
Less Risk of Damage: Since ultrasonic cleaning doesn't involve scrubbing or using harsh chemicals, there's less risk of damaging delicate dental items. The gentle nature of the process makes it ideal for sensitive materials and components.
-
Improved Sterilization: Dentists will want to combine ultrasonic cleaning with a sterilization phase, which can further enhance the cleanliness of the items. This step can kill bacteria, viruses, and other pathogenic organisms that may remain after manual cleaning.
- Environmentally Friendly: Ultrasonic cleaners use less water and fewer chemicals than manual cleaning methods. This makes them a more environmentally friendly option.
How Ultrasonic Cleaner Works
Ultrasonic dental cleaners operate on scientific principles that transform cleaning effectiveness:
High-frequency sound waves (typically 25-40 kHz) create millions of microscopic cavitation bubbles in the cleaning solution
These bubbles implode against instrument surfaces, creating localized pressure and temperature changes that dislodge contaminants
The resulting mechanical action penetrates areas inaccessible to manual brushing, removing bioburden from the most complex instrument geometries
Ultrasonic cleaners can clean multiple instruments simultaneously, reducing the time and effort required for cleaning.
Ultrasonic cleaning reduces the risk of injury and infection because it doesn’t require manual scrubbing or the handling of sharp instruments.
This technology doesn't merely supplement manual cleaning—it fundamentally transforms the cleaning process with precisely controlled energy that reaches every instrument surface, creating a level of cleanliness impossible to achieve through traditional methods.
When integrated into your sterilization workflow, ultrasonic technology establishes a scientific approach to instrument processing that enhances patient safety, protects your team, and preserves your instrument investment.
Procedure for Cleaning Dental Instruments Using an Ultrasonic Cleaner
Step 1 — Preparation
Put on appropriate PPE (gloves, mask, eye protection, and protective clothing).
Fill the ultrasonic cleaner tank with the recommended enzymatic or neutral pH cleaning solution, diluted according to the manufacturer's instructions.
Set the temperature to the recommended range (typically 40–55°C).
Step 2 — Degas the Solution
Run the ultrasonic cleaner for 5–10 minutes without instruments to degas the fresh solution and activate full cavitation performance.
Step 3 — Pre-Rinse Instruments
Rinse instruments under running water to remove gross debris and blood before placing them in the tank.
Do not allow instruments to dry out before cleaning.
Step 4 — Load the Instruments
Place instruments in the basket or cassette in a single layer — do not overload.
Ensure all surfaces are fully submerged.
Keep sharp instruments (e.g., scalers, burs) separated to prevent damage.
Do not mix dissimilar metals (e.g., stainless steel and aluminum) in the same cycle.
Step 5 — Run the Cleaning Cycle
Set the timer for 3–10 minutes depending on the level of contamination and the unit's specifications.
Keep the lid closed during operation to reduce aerosol and noise.
Step 6 — Rinse
Remove the basket and rinse instruments thoroughly under running water to remove all cleaning solution residue.
Use a dedicated rinsing sink separate from the cleaning area.
Step 7 — Inspect
Visually inspect each instrument for remaining debris.
Re-run any instruments that are not visibly clean.
Step 8 — Dry
Dry instruments with a clean, lint-free cloth or use a drying cabinet.
Ensure instruments are completely dry before packaging for sterilization.
Step 9 — Sterilization
Package instruments and proceed to autoclave sterilization per your clinic's protocol.
Record the cycle in your sterilization log.
Step 10 — Maintenance
Drain and clean the tank at the end of each day.
Change the cleaning solution at least daily or when visibly contaminated.
Perform a foil test regularly to verify cavitation effectiveness.
Important: Ultrasonic cleaning is a decontamination step only — it does not sterilize. All instruments must be sterilized after cleaning before clinical use.
Factors to Consider When You Need an Ultrasonic Dental Instrument Cleaner
Here are some key factors to consider when you need an ultrasonic dental instrument cleaner:
Size and Capacity: Depending on the number of instruments you need to clean at a time, choose a cleaner that can accommodate your needs. Some units are compact and perfect for small clinics, while others are large enough for larger clinics or hospitals.
Cleaning Efficiency: Some cleaners are more efficient than others, depending on the ultrasonic technology they use. You should consider the cleaning rate and the cleaning process’s thoroughness.
Ease of Use: It’s important to choose a user-friendly cleaner. Consider factors like digital displays, automatic timers, and easily understandable controls.
Durability: The longevity of the cleaner is another crucial factor. Consider the quality of materials used in construction and the manufacturer’s reputation for making durable products.
Maintenance and Cleaning: Some cleaners are easier to maintain than others. Consider how easy it is to drain and refill the tank and clean the unit itself.
Price: Look for a cleaner that offers good value for money. This doesn’t necessarily mean the cheapest option, but a balance between cost and quality.
Safety Features: Safety should always be a priority when dealing with medical equipment. Look for features such as automatic shut-off functions, temperature control, and secure lids.
Warranty and After-Sales Service: Consider the warranty period and the manufacturer’s after-sales service. This gives you peace of mind, knowing you can get help if something goes wrong with your cleaner.
Remember that the correct cleaner for you depends on your needs and circumstances.
Optimal Frequency and Functions for Dental Instrument Cleaning
A 37 kHz ultrasonic frequency and sweep and pulse functions commonly provide the most effective cleaning.
The 37 kHz frequency is ideal for most dental instrument cleaning requirements, providing optimal power for efficient cleaning.
The sweep function helps to evenly distribute the ultrasonic waves throughout the cleaning tank, ensuring that all instruments are properly cleaned.
The pulse function creates intermittent bursts of power, further enhancing the cleaning process by dislodging stubborn debris.
In addition to these functions, the timer and, optionally, degas mode are also important in ultrasonic cleaning.
The timer allows for precise control of the cleaning time, while the degas mode removes trapped air from the cleaning solution, improving the overall effectiveness of the cleaning process.
Also, ensure you have high-quality temperature controls, which help prevent contaminants from baking on surfaces.
Look for cleaners with a lid and tank drain for easy handling and maintenance.
Are There Any Specific Dental Instruments That Should Not Be Cleaned Using An Ultrasonic Cleaner?
Certain dental instruments should not be cleaned using an ultrasonic cleaner. These include:
Those with sharp edges or points, as ultrasonic cleaning can dull these.
Those made of soft metals, like aluminum, as high-frequency vibrations can damage them.
Those with adhesive components, as the cleaner may weaken the adhesive.
Some types of handpieces, depending on the manufacturer’s instructions.
Dental mirrors: The vibrations from an ultrasonic cleaner can damage the reflective surface of dental mirrors.
Always refer to the manufacturer’s instructions before cleaning any dental instrument to ensure it is safe to use an ultrasonic cleaner.
In Conclusion:
Dental offices and clinics that use ultrasonic cleaners for dental instruments should see increased productivity and cleaning effectiveness while reducing staff exposure to dangerous contaminants and risk of injury due to sharp edges.
AZDENT offers professional ultrasonic cleaners designed for dental and medical applications, all selected for efficiency, reliability, and precision. Each unit uses advanced cavitation technology to remove debris, reduce manual scrubbing, and extend instrument life.
Every ultrasonic cleaner is backed by a manufacturer warranty plus AZDENT quality assurance—so you can maintain the highest standards of infection control with complete confidence.
Contact AZDENT and shop trusted dental and medical ultrasonic cleaning equipment