|
1. Press button "△"for 1 second and release the button when the buzzer warns for once. Following three modes are available
- Full Power Mode: The screen shows “∏” The output light intensity is full-power. (recommended mode for clinical)
- Progressive Mode: The screen shows “ɲ” The output light intensity enhances gradually power output is to maximum after 5 seconds
- Pulsed Mode: The screen shows“∏∏”the blue light works in pulse manner
2. Press button "△"for 2 second and release the button when the buzzer warns for twice. Following three modes based on output of power density are available.
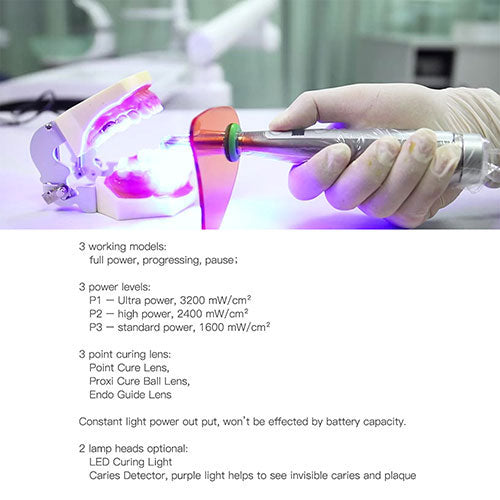
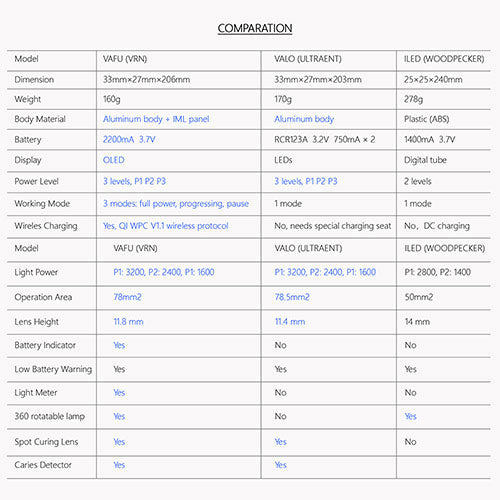
- Ultra High Power Density: The screen shows "P1" The power density is about 3200mW/cm.
- High Power Density: The screen shows "P2", The power density is about 2400mW/cm²
- Standard Power Density: The screen shows "P3", The power density is about 1600mW/cm².
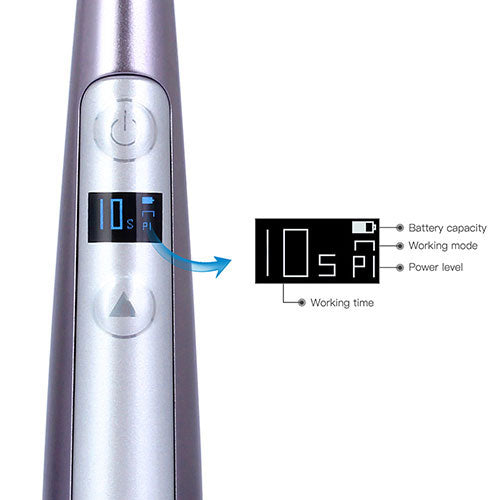
3. Tap button "△" to select working time interval. In"P3"mode, the time interval can be chose from 1,2,3.4,5.10,15,20 25,30, 35, 40 second In"P2"mode, the time interval can be chose from 1,2,3.4,5, 10,15,20 second In"P1"mode, the time interval can be chosefrom 1,2.3, second Information on the screen is shown in the figure.
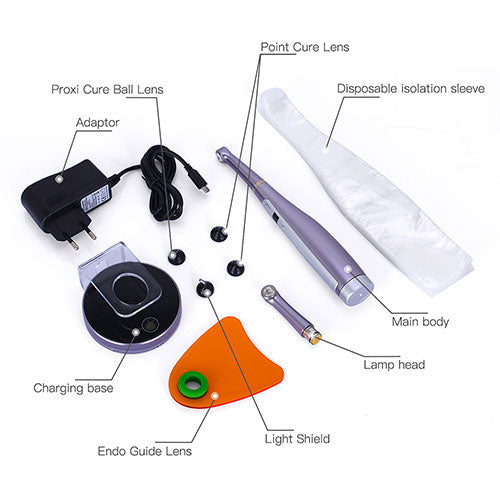
4. During the operation, put the disposable sleeve on the top of the main unit, aim the top at the correct position, press the ON/OF F button ("O" )and the main unit will produce 'Di' sound, the curing light radiates blue light and starts working according to the set modes Meanwhile, it starts counting down from the set working time interval, it stops working when counting down to ("O" )The screen displays the set working time interval again.
5. Operation can be stopped by paras the ON/OFF button ("O").
6. After a working cycle, operator can press the ON/OFF button ("O"). to start another working cycle. Stop operating if the equipment is burning obviously, let equipment cool down before restarting. Suggest continous working cycle less than 5 times.
7. Battery Indicator: Low power detective circuit is fixed inside of the main unit.If battery indicator in the screen has only 1 bar left, please charge in time.
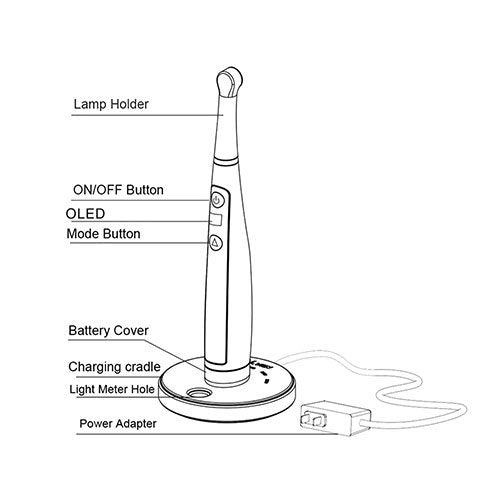
8. When the battery needs to be charged. plug USB Type A jack in USB Type A plug of power adapter, and connect the plug of power adapter into the AC 100V-240V power supply, and connect Micro USB of USB cable into charge indicator in charge. The blue indicator light on charger indicates charger on standby. Put the main unit to the charging point of the charger, and the indicator light turns green, main unit is detected. Meanwhile,the indicator light at the bottom of main unit turn green, the curing light starts charging. When charging finished, the indicator light at the bottom of main unit turn blue.
9. After operating, take off the disposable sleeve and throw away, avoid reusing. Power output will be, decreased by 5-10% if using the disposable sleeve.
10. The product will turn off automatically if there is And operations within 2 minutes. Turn it on by pressing any button.
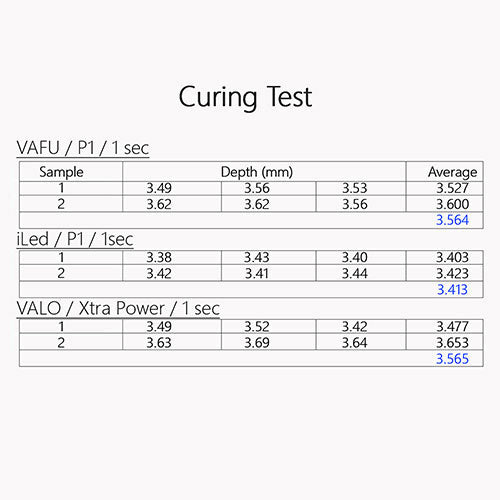
11. The depth of solidification or dental resin composite is not less than 4mm per 10 second. The recommended separation distance between Iuminous point and solidifying point is 2mm.
|


